Bread · Traditional · Essential
Greek Pita Bread
The soft, pocketless flatbread that defines Greek street food
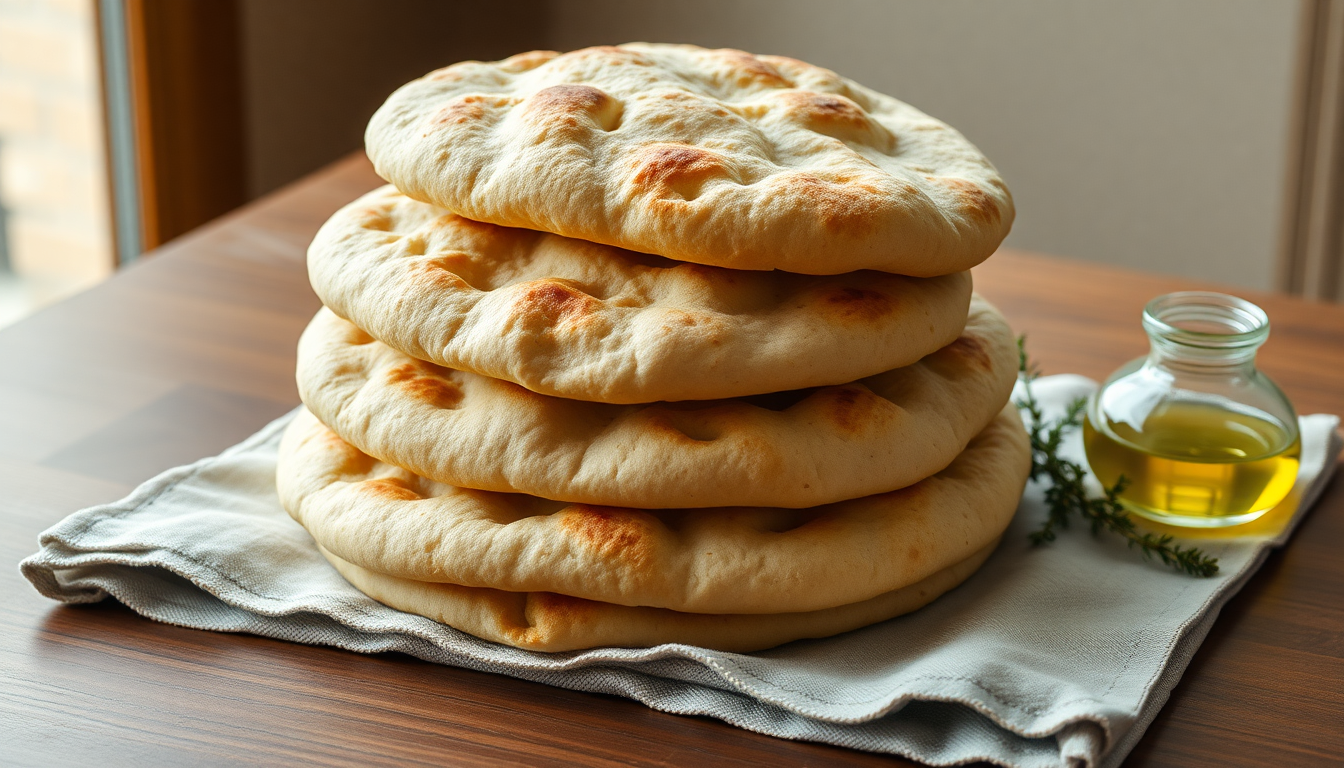
Greek pita bread is not Middle Eastern pita. This distinction matters because the two breads serve different purposes and require different techniques. Middle Eastern pita — the kind you find at Lebanese or Israeli restaurants — has a hollow pocket that splits open to create a sandwich. Greek pita is pocketless: a soft, fluffy, slightly chewy flatbread designed to wrap around grilled meat without splitting. It contains olive oil in the dough, which keeps it pliable even when cooled. It is thicker than pocket pita, with a tender crumb that absorbs sauces rather than containing them. This is the bread that makes souvlaki and gyros possible. Without it, Greek street food as we know it does not exist. This guide covers everything: the flour choice that determines texture, the yeast activation that ensures rise, the pan temperature that creates the signature puff, and the serving methods that make the most of fresh pita.
Greek Pita vs Middle Eastern Pita: The Critical Distinction
The confusion is understandable. Both are round, flat, leavened breads from the eastern Mediterranean. Both use similar ingredients: flour, water, yeast, salt. But the results are fundamentally different.
| Characteristic | Greek Pita | Middle Eastern Pita |
|---|---|---|
| Structure | Solid, pocketless | Hollow pocket that splits open |
| Thickness | 1/4 inch (6mm) | 1/8 inch (3mm) |
| Fat content | Contains olive oil (keeps it soft) | Usually fat-free |
| Primary use | Wrapping souvlaki, gyros, scooping dips | Splitting and filling like a sandwich |
| Texture when cooled | Remains soft and pliable | Becomes stiff and crackly |
| Cooking method | Hot skillet or griddle | Very hot oven (500°F+) or tandoor |
This distinction matters because you cannot substitute one for the other. A souvlaki wrapped in pocket pita splits open and spills its contents. A falafel sandwich made with Greek pita is too thick and bready. The breads evolved for different purposes, and understanding this prevents disappointment.
Flour Comparison: What Each Type Does
The flour you choose determines the final texture of your pita. Here's what each option produces.
All-Purpose Flour (Recommended)
The standard choice for a reason. All-purpose flour produces a pita that is soft but holds its shape, with enough gluten development for chewiness without becoming tough. It is forgiving, consistent, and produces results closest to what you find at Greek tavernas. Use unbleached if available — the slight difference in protein content (10-12%) creates the ideal balance.
Bread Flour
Higher protein content (12-14%) means more gluten development and a chewier result. Greek pita made with bread flour has more "bite" and holds up better to heavy fillings like lamb gyros. The trade-off: it can become rubbery if over-kneaded or overcooked. If using bread flour, reduce kneading time by 1-2 minutes and watch carefully during cooking.
Whole Wheat Flour
Can replace up to half the all-purpose flour for a nuttier, more substantial pita. Beyond 50% whole wheat, the pita becomes dense and heavy — the bran interferes with gluten development. If going 100% whole wheat, increase the water by 2 tablespoons and extend the rising time by 30 minutes. The result is healthier but not traditional.
00 Flour (Italian)
Finely milled and lower in protein, 00 flour produces an exceptionally tender pita with a silky crumb. Some Greek bakeries use it for this reason. The trade-off is less structure — the pita tears more easily when wrapping meat. Use only if you prioritize tenderness over durability.
Our recommendation
For your first batch, use all-purpose flour. It is the most forgiving and produces results closest to authentic Greek pita. Once you have the technique down, experiment with 25% whole wheat or bread flour to find your preferred texture.
The Recipe: Step-by-Step
Ingredients (makes 8 pitas)
- 3 1/2 cups all-purpose flour (450g), plus extra for dusting
- 1 1/2 cups warm water (360ml) — about 100°F/38°C
- 2 1/4 teaspoons active dry yeast (1 packet / 7g)
- 1 teaspoon sugar
- 1 teaspoon salt
- 2 tablespoons olive oil, plus more for cooking
Step 1: Activate the Yeast
Combine warm water, sugar, and yeast in a large bowl. Stir gently to dissolve. Let sit 5-10 minutes. The surface should become foamy with small bubbles — this confirms the yeast is alive. If no bubbles appear after 10 minutes, your yeast is dead. Discard and start with fresh yeast. This step is non-negotiable. Adding dead yeast to flour produces flat, dense bread.
Step 2: Mix the Dough
Add flour, salt, and olive oil to the yeast mixture. Stir with a wooden spoon until a shaggy dough forms. The dough will look messy and uneven at this stage — this is correct. Turn onto a lightly floured surface. The dough should feel soft and slightly tacky but not sticky. If it sticks to your hands excessively, add flour 1 tablespoon at a time.
Step 3: Knead
Knead for 5-7 minutes until smooth and elastic. Push the dough away with the heel of your hand, fold it back over itself, rotate a quarter turn, and repeat. The dough is ready when it springs back slowly when poked. Under-kneaded dough produces dense pita; over-kneaded dough becomes tough.
Step 4: First Rise
Lightly oil a clean bowl. Place dough inside, turn to coat with oil, and cover with a damp towel. Let rise in a warm, draft-free spot for 1-2 hours until doubled in size. The time depends on room temperature — cooler rooms require longer rising. The dough is ready when a finger pressed into it leaves an indentation that does not spring back.
Step 5: Divide and Rest
Punch down the dough to release air. Turn onto a floured surface. Divide into 8 equal pieces — use a kitchen scale for precision (about 85g each). Shape each piece into a ball by tucking the edges underneath. Cover with a damp towel and let rest 15 minutes. This relaxes the gluten, making the dough easier to roll without shrinking back.
Step 6: Roll
Working with one ball at a time, roll into a 6-inch circle about 1/4 inch thick. Roll from the center outward, rotating the dough as you go. Keep rolled pitas covered with a damp towel to prevent drying. If the dough springs back while rolling, let it rest 5 more minutes — the gluten needs more time to relax.
Step 7: Cook
Heat a non-stick skillet over medium-high heat. Brush lightly with olive oil. Cook one pita at a time for 2-3 minutes per side. The pita should puff up slightly and develop golden-brown spots with some charring. The first pita always takes longer — subsequent pitas cook faster as the pan heats evenly. Transfer to a plate and cover with a clean towel to keep warm and soft.
The Puff: Why It Happens and How to Control It
The signature puff of pita bread — when the center balloons up during cooking — is created by steam. Water in the dough turns to vapor when it hits the hot pan. The steam pushes the top and bottom layers apart, creating the characteristic bubble.
Why Your Pita Isn't Puffing
- Pan not hot enough: The water must turn to steam instantly. If the pan is too cool, the dough cooks before steam forms. The pan should be hot enough that water droplets sizzle and evaporate within 2 seconds.
- Dough too thick: If rolled thicker than 1/4 inch, the center doesn't heat fast enough to create steam before the exterior sets. Roll thinner.
- Dough too thin: If rolled too thin, there's not enough moisture to create sufficient steam. The pita cooks flat without puffing.
- Overworked dough: If you roll and re-roll the same piece multiple times, you press out air bubbles that help the puff. Roll each piece once, gently.
Pro tip
The puff is desirable but not essential for Greek pita. Unlike Middle Eastern pita, where the pocket is the point, Greek pita functions perfectly well without a full puff. Some of the best pitas are only partially puffed. Focus on even cooking and proper texture — the puff is a bonus, not a requirement.
Troubleshooting Common Problems
❌ "My pita is dense and heavy"
Causes: Dead yeast, not enough rising time, or too much flour. Fix: Always proof yeast first — if it doesn't foam, don't proceed. Let the dough rise until truly doubled, not just "kind of bigger." Measure flour by weight if possible; cup measurements vary by 20% or more.
❌ "My pita is tough and chewy"
Causes: Over-kneaded dough or cooked too long. Fix: Knead only until smooth and elastic — about 5-7 minutes. If using bread flour, knead even less. Cook just until golden spots appear, 2-3 minutes per side. Overcooking dries out the pita.
❌ "My pita burns on the outside but is raw inside"
Causes: Pan too hot or dough too thick. Fix: Reduce heat to medium. The pan should be hot but not smoking. Roll dough to consistent 1/4 inch thickness — thicker dough requires lower heat and longer cooking.
❌ "My pita tears when I wrap it"
Causes: Under-kneaded dough, cooked too long, or not enough olive oil in the dough. Fix: Knead until the dough passes the windowpane test (stretch a small piece — it should thin to transparency without tearing). Don't skip the olive oil — it's what keeps Greek pita pliable.
Storage and Reheating
Short-Term Storage (1-2 Days)
Store cooled pita in a resealable plastic bag at room temperature. The bag traps moisture and keeps the pita soft. Do not refrigerate for short-term storage — the cold air dries out bread faster than room temperature.
Medium-Term Storage (3-5 Days)
Refrigerate in a sealed bag. The pita will firm up slightly but remains usable. Bring to room temperature before serving, or reheat to restore softness.
Freezing (Up to 3 Months)
Cool completely. Place parchment paper between each pita to prevent sticking. Stack and transfer to a freezer bag, pressing out as much air as possible. Freeze flat. Reheat directly from frozen — no need to thaw first.
Reheating Methods
Skillet (best): Heat a dry skillet over medium heat. Warm pita 30 seconds per side until soft and pliable. This restores the fresh-cooked texture.
Oven: Wrap stacked pitas in foil. Heat at 350°F for 5-7 minutes. Good for reheating multiple pitas at once.
Grill: Brush with olive oil and grill 30 seconds per side until marked. Adds char flavor — excellent for serving with dips.
Microwave (avoid): Makes pita rubbery and tough. Only use if no other option exists — wrap in a damp paper towel and heat 10-15 seconds.
Serving Suggestions: What to Do With Fresh Pita
The Souvlaki Wrap
The classic use. Warm pita, grilled meat skewers, tzatziki, sliced tomato, red onion, and fries tucked inside. The pita's softness and pliability make it possible to wrap everything tightly without tearing.
The Gyros Roll
Similar to souvlaki but with rotisserie meat. The pita is warmed, the meat is piled on, sauce and vegetables are added, and the whole thing is rolled into a handheld package. The pocketless structure prevents the filling from falling out the bottom.
Dip Scooping
Tear warm pita into wedges and serve with tzatziki, hummus, melitzanosalata (eggplant dip), or taramasalata (fish roe dip). The soft texture absorbs dips better than crackers or raw vegetables.
Pita Pizza
Brush with olive oil, top with tomato sauce, cheese, and toppings. Bake at 425°F for 8-10 minutes until crisp. The pita becomes a thin, crispy crust — faster than making pizza dough from scratch.
Breakfast Pita
Split a warm pita and fill with scrambled eggs, feta, and fresh herbs. Or spread with Greek yogurt and honey. The neutral flavor of pita complements both savory and sweet fillings.
Frequently Asked Questions
What is the difference between Greek pita and Middle Eastern pita? ▾
Why is my pita bread not puffing up? ▾
Can I make pita bread without yeast? ▾
What flour is best for pita bread? ▾
How do I store and reheat pita bread? ▾
Can I make the dough ahead of time? ▾
Conclusion
Greek pita bread is the foundation of Greek street food — the soft, pliable flatbread that makes souvlaki and gyros possible. Unlike its Middle Eastern cousin, it has no pocket, contains olive oil, and remains soft even when cooled. These characteristics are not accidents — they are the result of centuries of evolution to serve a specific purpose: wrapping grilled meat without splitting, absorbing sauces without disintegrating, and tasting good even at room temperature.
Making pita at home requires patience — the rising, the resting, the rolling — but the reward is bread that tastes nothing like the packaged versions at the grocery store. Fresh pita, still warm from the pan, has a tenderness and flavor that cannot be replicated industrially. It is one of the most satisfying breads to make at home because the technique is straightforward, the ingredients are simple, and the result is immediately useful.
Whether you are building a complete Greek meal or just need something to scoop up hummus, this recipe delivers. The flour choice determines texture. The yeast activation ensures rise. The pan temperature creates the puff. And the olive oil keeps everything soft. Master these elements, and you have mastered Greek pita.